Instructions
Step 1: The Critical Prep – Removing the Membrane
This is the non-negotiable first step to ensure your ribs are tender all the way through, not chewy.
-
Place the rack of ribs meat-side down on a cutting board. Locate the thin, shiny membrane covering the bony side.
-
Slide a butter knife or your finger under the membrane at one end of the rack to loosen it.
-
Grab the membrane with a paper towel for a better grip (it’s slippery!) and pull it off in one piece, if possible. If it tears, just get under it again and keep pulling. Discard the membrane.
Step 2: Apply the Flavor Foundation – The Dry Rub
-
In a small bowl, whisk together the brown sugar, smoked paprika, garlic powder, onion powder, chili powder, salt, black pepper, and cayenne.
-
Pat the ribs completely dry with paper towels. This helps the rub stick.
-
Generously massage the spice rub into both sides of the ribs, covering every inch. Don’t be shy! This forms a delicious crust.
Step 3: The Slow Cooker Setup
-
In a measuring cup or small bowl, whisk together the apple juice, apple cider vinegar, and Worcestershire sauce. If using, add 2-3 drops of liquid smoke. Do not overdo the liquid smoke!
-
Pour this mixture into the bottom of your slow cooker. This will create a steamy environment, braising the ribs to perfection without boiling them.
-
For maximum tenderness and easy removal: Create a “rack” with balls of aluminum foil to keep the ribs elevated out of the liquid. Alternatively, you can carefully coil the rib rack and stand it on its side against the wall of the crockpot.
-
Place the seasoned rib rack into the slow cooker (on the foil rack or coiled).
Step 4: The Low & Slow Magic
-
Cover and cook on LOW for 6-8 hours. This is the secret. Cooking on LOW gently melts the fat and breaks down collagen without making the meat mushy. Avoid cooking on HIGH if you can; it can cause the meat to overcook and fall off the bone too aggressively.
-
The ribs are done when the meat is extremely tender and has pulled back from the ends of the bones by about ½ inch.
Step 5: The Grand Finale – Saucing & Caramelizing
This step transforms the ribs from simply tender to authentically barbecue-glazed.
-
Preheat your broiler to high. Line a baking sheet with aluminum foil for easy cleanup.
-
Carefully remove the ribs from the slow cooker. They will be very tender and may try to fall apart. Using two large spatulas is helpful.
-
Place the ribs meat-side up on the prepared baking sheet.
-
Brush a generous layer of your barbecue sauce all over the top of the ribs.
-
Place the baking sheet under the broiler, about 6 inches from the heat element. Watch it closely! Broil for 3-5 minutes, until the sauce is bubbly, caramelized, and slightly charred in spots.
-
Remove from the oven, brush with another thin layer of fresh sauce for a glossy finish, and let them rest for 5-10 minutes.
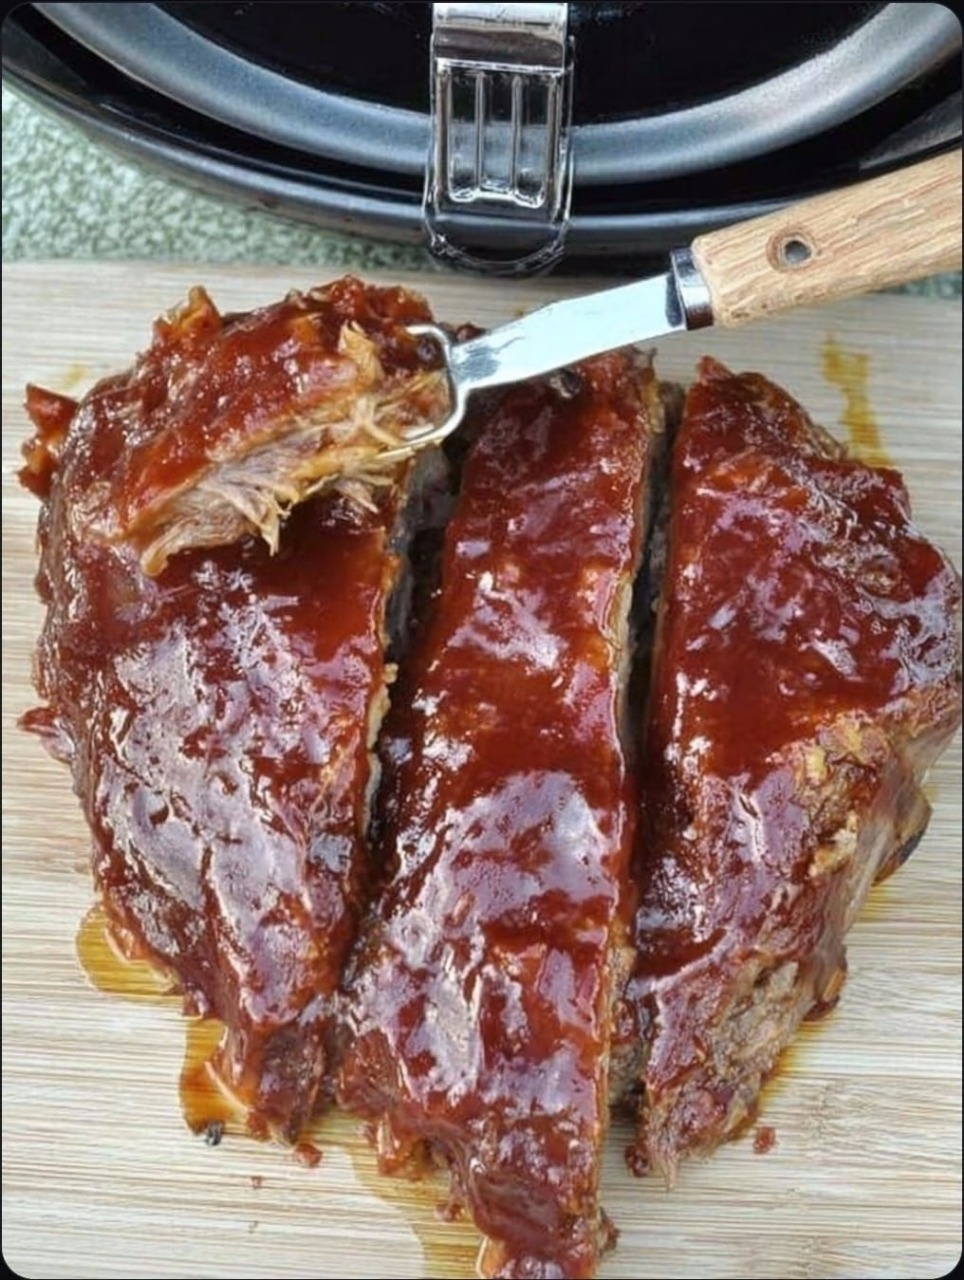
Step 6: Serve & Become a Legend
-
Slice the ribs between the bones.
-
Serve immediately with extra warm barbecue sauce on the side, plenty of napkins, and your favorite sides (classic coleslaw, cornbread, and baked beans are perfect).
Pro Tips & The “Why” Behind Them
-
The Membrane is the Enemy: Leaving it on creates a barrier that prevents flavor from penetrating and results in a tough, chewy texture. Removing it is the single most important prep step.
-
Low and Slow is Non-Negotiable: High heat will cook the ribs faster, but it will make the texture more “pot-roasty” and can cause them to become mushy and fall apart completely before you can get them out of the pot. LOW heat provides superior control and texture.
-
Don’t Submerge in Sauce: Adding all the sauce at the beginning causes it to thin out and become watery from the rendered juices. Braising in a little liquid and adding sauce at the end preserves its rich, thick consistency.
-
The Broiler is Your Best Friend: The slow cooker makes them tender, but the broiler provides the “grill” effect—caramelization, char, and that sticky, finger-licking texture you crave. Do not skip this step!
-
Resting is Key: Letting the ribs rest for a few minutes after broiling allows the juices to redistribute throughout the meat, ensuring every bite is moist and flavorful.
Enjoy your masterpiece. You’ve just made barbecue rib perfection with minimal effort. Welcome to the club.
